If Chip & Joanna Revised Your Essay...

In the spirit of the HGTV show, Fixer Upper, I’ve created the fixer-upper method for revising and editing an essay or other written work.
The method has five steps, but it assumes you have a few rough drafts hanging around and ready to choose from.
So, before you throw all those drafts in the real or virtual trash, revise them using the fixer-upper method.
The Fixer-upper Method for Revising and Editing an Essay or Other Written Work
Step 1: The Fixer Upper House Tour
In the show, the first step is selecting a fixer-upper to fix up.
Chip and Joanna show their client a few houses and give them an idea of the home’s potential. Then the client picks one.
That’s what you’ll do with your rough drafts.
First, look through them. Read them. Think about one you can see yourself “living in,” i.e. working on for a while.
Then pick the one you like best and has the most potential. Be sure it’s a draft you aren’t completely opposed to working on for a few days, weeks -- or in some cases, months.
This means you like the ideas contained within the piece. The work has potential and can satisfy the assignment or other goal. And, you have more you can add to it.
Essentially, you like the size (perhaps how much you already wrote and have ideas you can add to it for future writing).
And, you also like the location (the direction the writing ideas are going).
You are now ready to move forward with the renovation (i.e. the revision).
Step 2: The Walk-Thru
Quick Guide:
Fixer-upper Method for Revising & Editing
- The House tour: Look at your drafts; pick one.
- The Walk-thru: Take stock of what you have, what needs fixing/revising, and what needs to be added. Then make a plan or outline.
- Demo Day: On paper or your computer, remove everything you don't need.
- Construction Day: Start writing. Add all the elements you planned to. This takes the longest and is the most difficult part of fixing up your fixer-upper.
- Joanna's Late Night Move-in Ready Design Touches: After all the writing is done, look over your paper again. Look for typos, areas that need clarification, and other places that need special touches. Then do one final once-over proof read and call your paper finished.
Once the couple chooses a house, Chip and Joanna do another walk-thru by themselves to make note of problems and things that need addressing.
You'll do the same with the writing draft you selected.
That means looking at what you wrote more carefully.
This is important, because you have to see what you have, what you’ll need to add, and what needs fixing.
You'll also make mental and handwritten (or typed) notes to create a new outline for your paper. (If you need help with organization, go here.)
It’s like when Joanna creates those computerized models of what the client’s home will look like when it’s finished.
She takes into consideration the budget and the client’s wants, needs, and likes. And, she does it before demo day.
So, look at your work. Decide what direction you’ll go.
If you need more materials (i.e. research for your report), then go to the library or do an online search.
Gather all those things together. Make your outline--your virtual model of what your writing project will look like when you’re finished.
Then move on to Demo Day.
Step 3: Demo Day (Chip's favorite day!)
This is the stage where you get to tear everything apart!
In writing that means, getting out that red pen. Crossing out things. Taking things to the trash (using the delete key or red pen :-) ). Making notes on your paper about what needs to go where. (Draw arrows if you need to.)
Basically, take the writing you’re working on (an essay, paper, book, etc.) to the bare bones.
Remove everything you don’t want. And keep only the elements you planned in your outline.
Then you’re ready for step four, construction.
Step 4: Construction Day(s)!
The construction of your work is the writing itself. It's where you take that outline and those notes and fill in the blanks.
Write the paragraph you found the extra research for.
Add the part you wrote on the piece of scratch paper during lunch the other day.
Basically, this is work. It’s probably the most exhausting and difficult part. And… you have to work your plan. Sometimes that’s just hard.
You write. And, you write. And you write some more. Follow the outline you created initially and make adjustments as needed.
When it’s all finished, move to step five for the finishing touches.
Step 5: Joanna's Late Night Move-in Ready Design Touches
If you watch the show, you know after all the construction is complete Chip gives Joanna the keys and tells her to get to work.
Joanna spends hours making the house a home for her clients. Her job is to add special design touches -- those little Joanna details that make the home sparkle.
That’s what this final writing step is all about. Making your paper, essay or book sparkle.
Take that writing you’ve been working on and read it over. Revise for typos. If you find parts that aren’t clear, you clarify your message by adding a sentence or two.
It’s those little details that clarify the meaning of what you’re communicating. It makes the work sparkle and your readers want to read your work.
That’s it!
If Chip and Joanna were to take on your writing project fixer-upper, this is the process I believe they’d use!
Advertisement:
Advertisement:

Writing Prompt
of the Week:
During stressful times, what brings you comfort? Exercise? Talking with a loved one? A special steamy beverage? Write about that …

Advertisement:
Recent Articles
-
How to Create a Christmas Letter Family & Friends Request Each Year
Nov 10, 23 08:40 PM
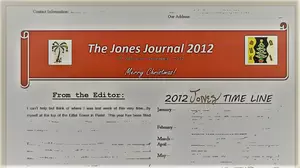 Some people go Griswold with their light displays. But, I like to do something similar with my annual Christmas newsletter. Here are 7 tips for writing your own custom Christmas letter.
 -
Write A Letter to Santa!
Nov 26, 22 07:25 PM
 Write a letter to Santa! Yes, Santa letter writing can be integrated into the school curriculum. Here's how to do it, and where students can send their letters.
 -
Speech Writing: 7 Steps for a Successful Speech
Jul 25, 21 05:50 PM
 If you're looking for speech writing help, here are seven steps for creating a great speech quickly.
 -
Prevent Writer's Block
Oct 26, 20 07:59 AM
 Writer's block affects even the best and most notable writers. Here are some ideas for preventing writer's block.
 -
Writing Ideas: Get Inspired With Pictures!
Apr 27, 20 10:02 PM
 A picture is worth a thousand words ... and a thousand writing ideas! To keep those writing ideas flowing, featured photos and some others end up here where they serve as inspiration for writers.
 "Change in all things is sweet." - Aristotle
About Contact Privacy Policy Disclaimer Newsletter Why I Use Solo Build It
© Copyright 2013 - 2026 SBWriting.com. All rights reserved. No reproduction permitted without permission.